HAPPY HOLIDAYS!! Christmas Ornaments make great gifts. Paper Mache Ornaments are easy and fun to make. You can use any type of paper to Decoupage Paper Mache. I used a cute wrapping Christmas paper I stumbled upon while shopping at Target and Kraft Paper from the Dollar Store.
This Holiday, I decided to participate in One Artsy Mama's first Ornament Exchange.

I was paired up with Melanie from BearRabbitBear. Decoupage is one of my favorite craft. I decided to create a Paper Mache Ornament for Melanie.
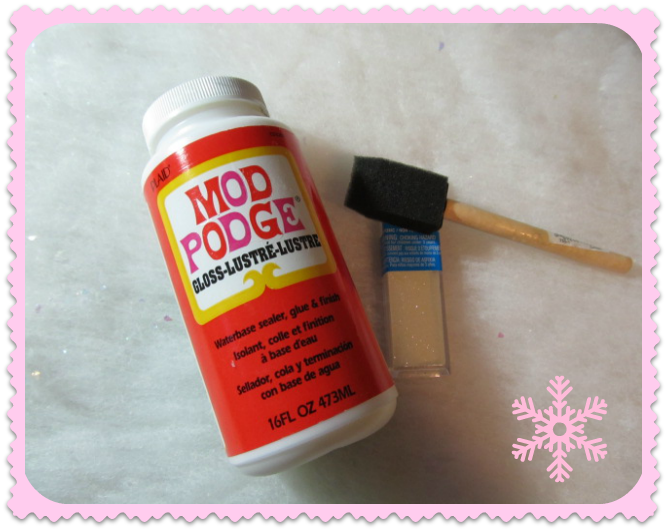
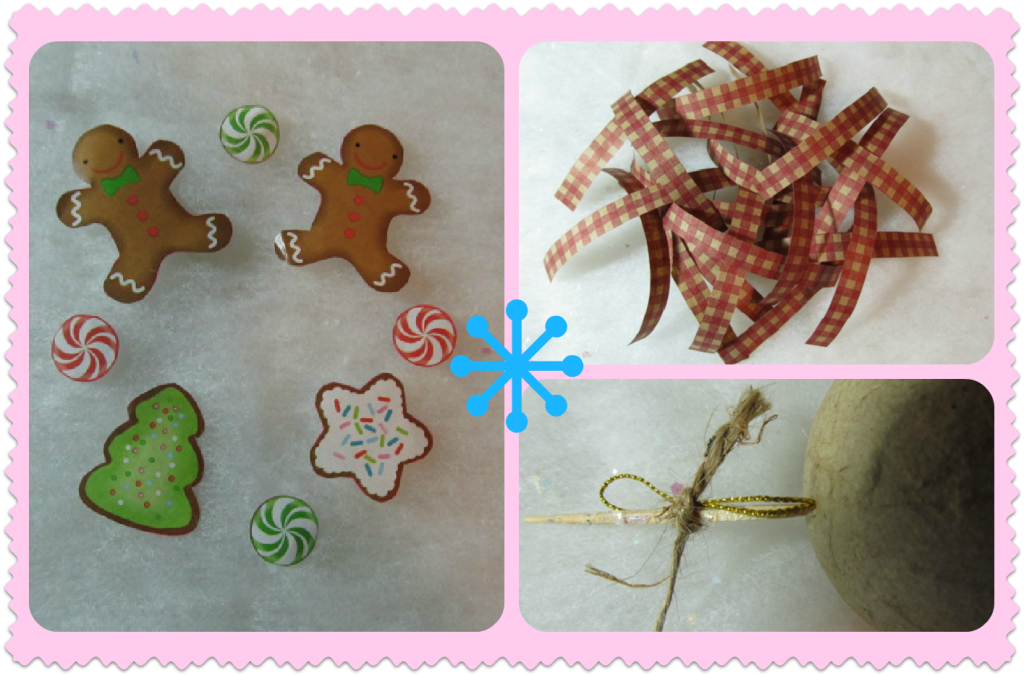
To begin, I gathered the following materials:
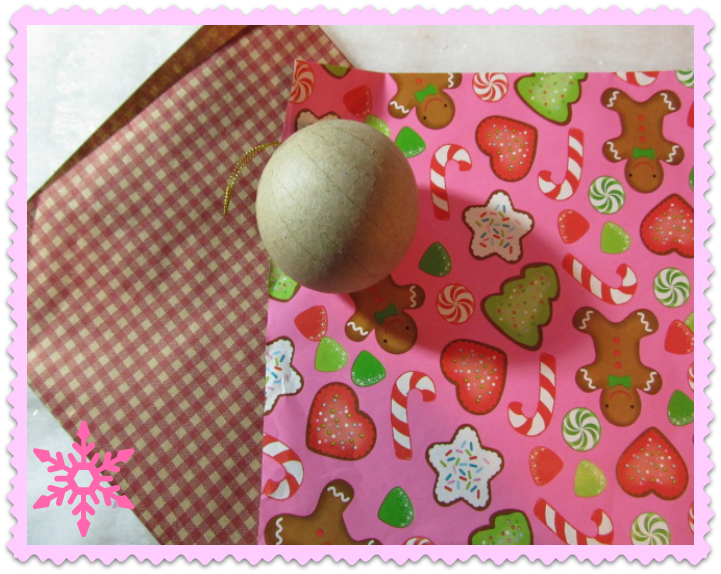
- 4" Paper Mache Round Ornament
- Wrapping Paper
- Kraft Paper
- Mod Podge
- Foam Brush
- Fine Glitter
- Toothpick
- Hot Glue & Sticks
- Cut out your designs from the wrapping paper. I cut two gingerbread men, one tree and one cookie, plus a few peppermint candies.
- Cut 20-25 1/2" x 4" strips of Kraft paper.
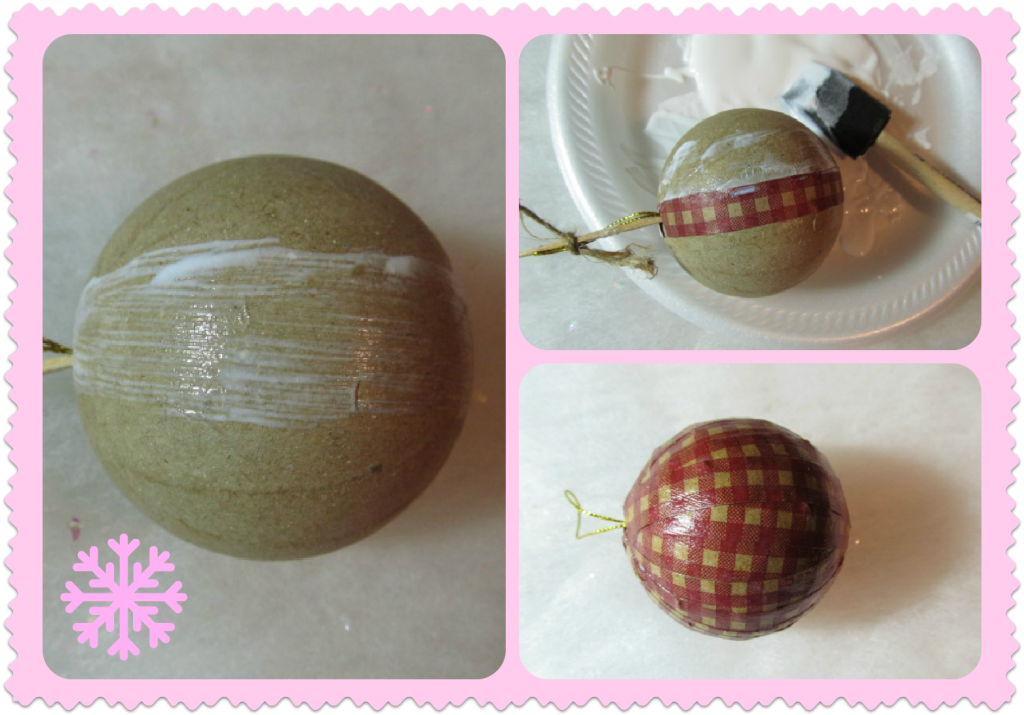
- Insert a toothpick inside the ornament's top section and tie the hanger to it to prevent gluing it to the surface. Having the toothpick inside the ornament will help you hold the ornament as you add your strips.
- Working in sections, begin adding the paper strips to the ornament. Apply a thin layer of Mod Podge to the ornament's surface and to the back of each paper strip. Apply strip to the ornament, smoothing with brush or your fingers.
- Continue adding and overlapping the paper strips until ornament is covered. Add another coat of Mod Podge over entire ornament. Let dry completely.
- Apply Mod Podge to your design cut-outs and apply them around the ornament. I applied my cut-outs using this sequence: gingerbread men, tree, gingerbread men and a cookie. I added the peppermint candies to the ornament's top section and one to the bottom.
- Apply another thin coat of Mod Podge over the entire ornament to seal the design. Let dry completely.
- Add a final Mod Podge coat and sprinkle glitter while the surface is wet. Let dry completely
- Remove the toothpick. If the hanger detaches from the ornament, use some hot glue to re-attach.
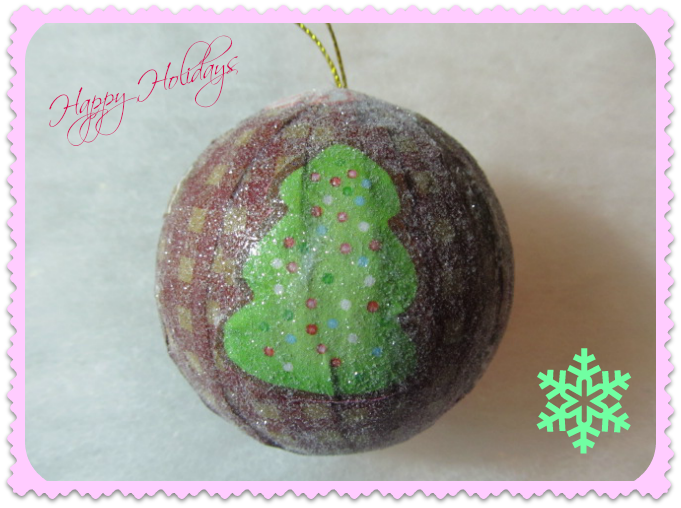
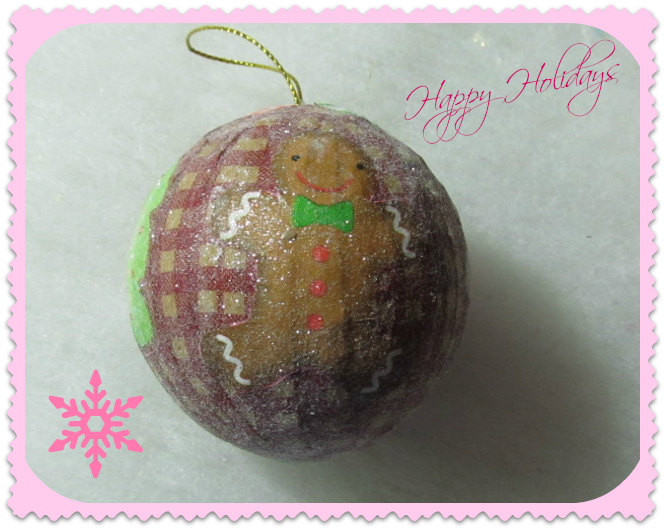
Here is another view of the Ornament. I love how this ornament turned out.
I hope Melanie likes it.
I hope Melanie likes it.

Merry Christmas!!!!
debbie-debbiedoos