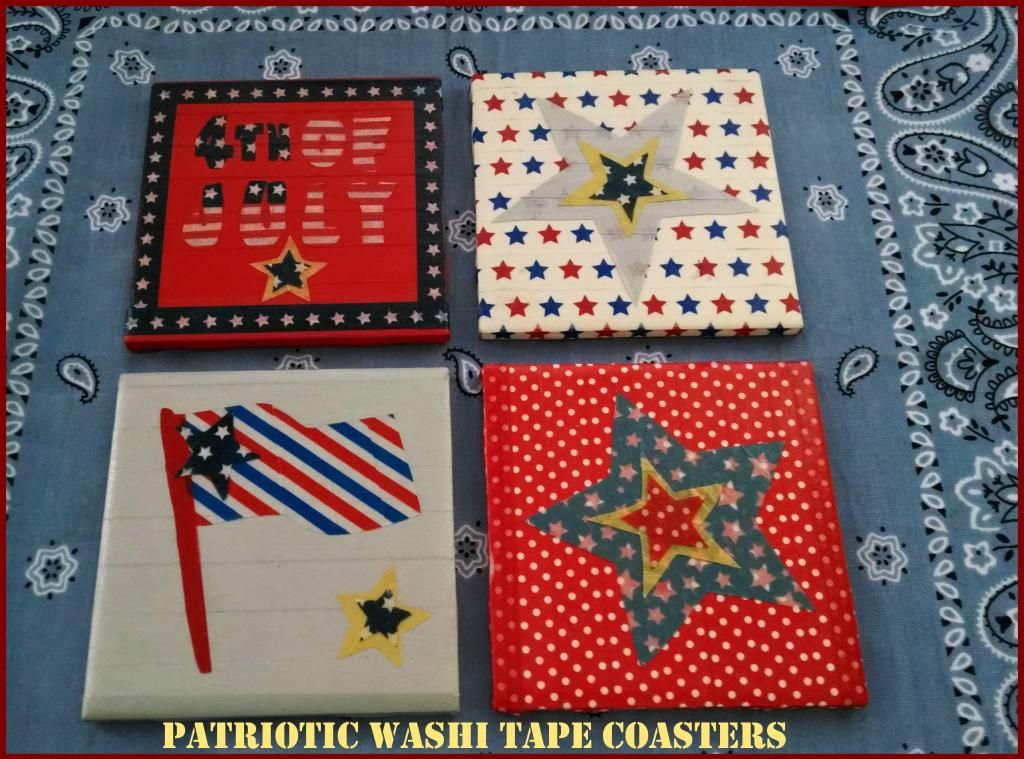
4th of July is my favorite Summer Holiday. I love to decorate my home with Sparkles, Stars and Stripes. I wanted to create Red, White and Blue coasters to bring some Patriotic Spirit to the outdoors.
One of my favorite Craft Supply is Washi Tape. On a trip to my favorite discount store; I stumbled upon a Patriotic Themed Washi Tape package. Along with my current Washi Tape stash, I decided to create two sets of Patriotic Washi Tape Coasters.
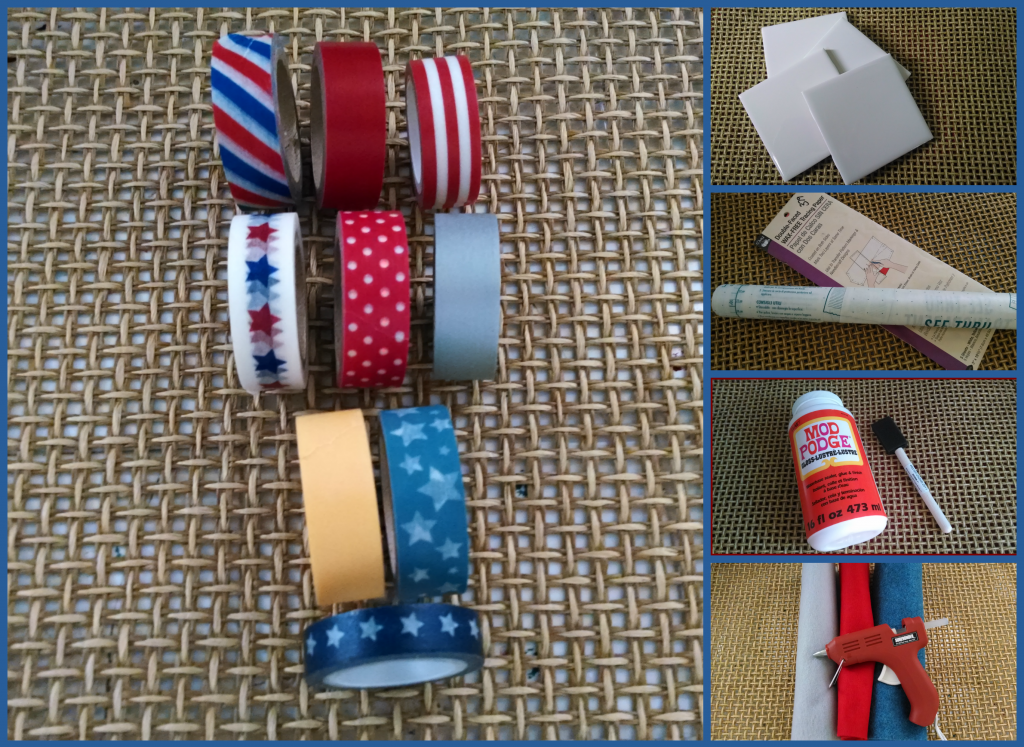
Here is what you will need to make your own coasters.
Materials:
- 4 - 4" Square Ceramic Tiles; purchased at Home Depot for 16 cents each.
- Patriotic Washi Tape
- Patriotic Graphics or Clip Art
- Contact Paper
- Tracing Paper
- Mod Podge/Foam Brush
- Pair of Tweezers
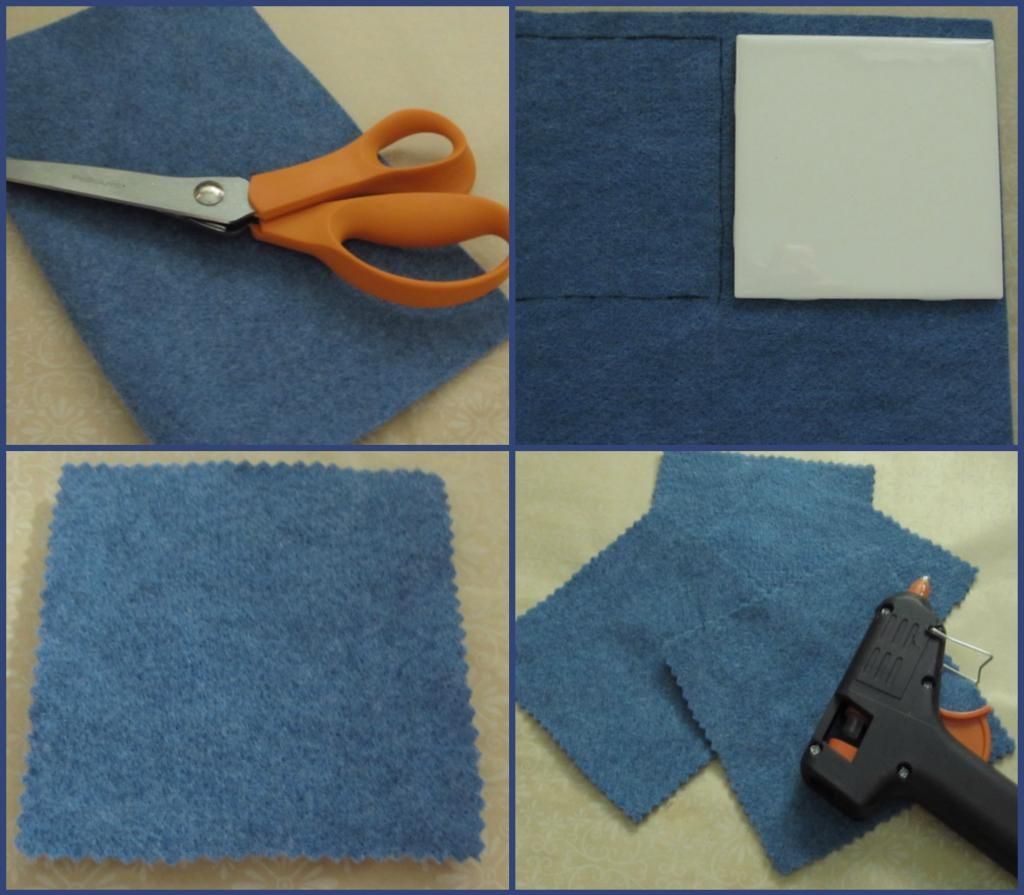
- Felt sheets
- Pinking Shears
- Hot Glue Gun
- Polyurethane - I used Minwax Clear Satin
- Small Paint Brush
Instructions:
1. Clean your tiles with bathroom cleaner to get rid of any dust. Let the tiles dry completely.
2. Begin adding your choice of Washi Tape across the tiles; slightly overlapping the stripes.
3. Select the Graphics you wish to trace and use as your tile's foreground. I found mine online.
If you wish to use my images, click on the right arrow to download and print the file.
4. Trace your Graphics using the Tracing and Contact papers by creating layers. Lay the contact paper with backing facing up; add tracing paper and finally your graphics.
5. Flip Contact paper over. Apply Washi tape to cover your traced graphics. I found it helpful to insert a blank sheet of printer paper under your contact paper to make it easier to see your traced lines.
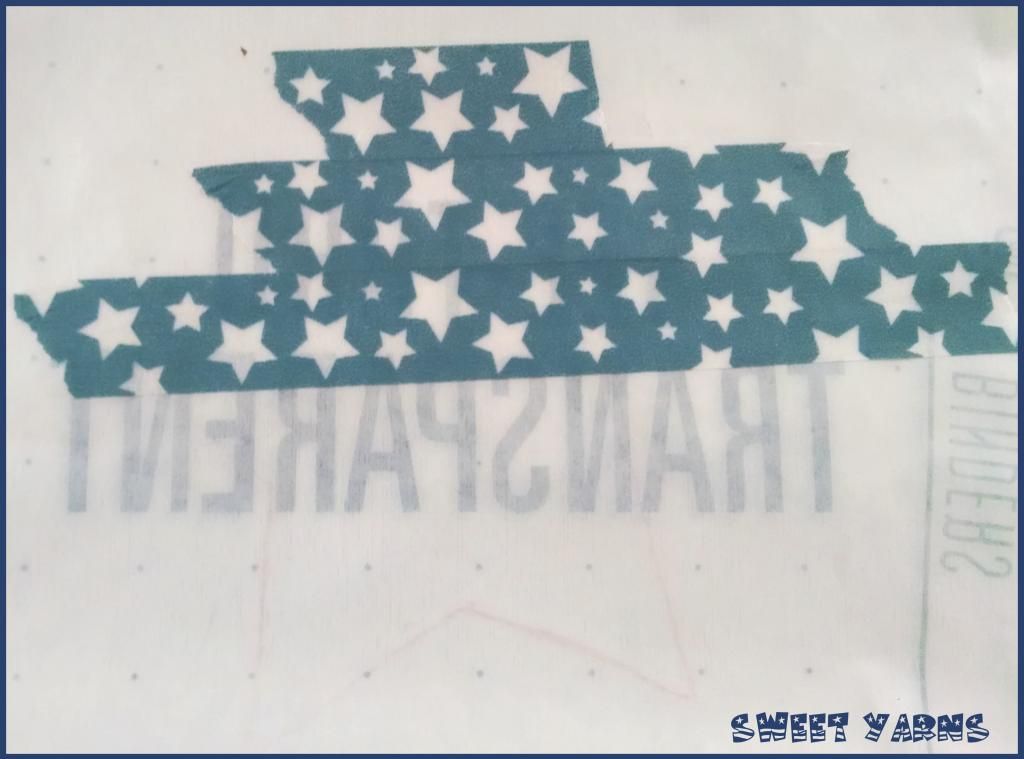
6. Cut your graphics around the traced lines. I used the tweezers to separate your traced images from the contact paper.
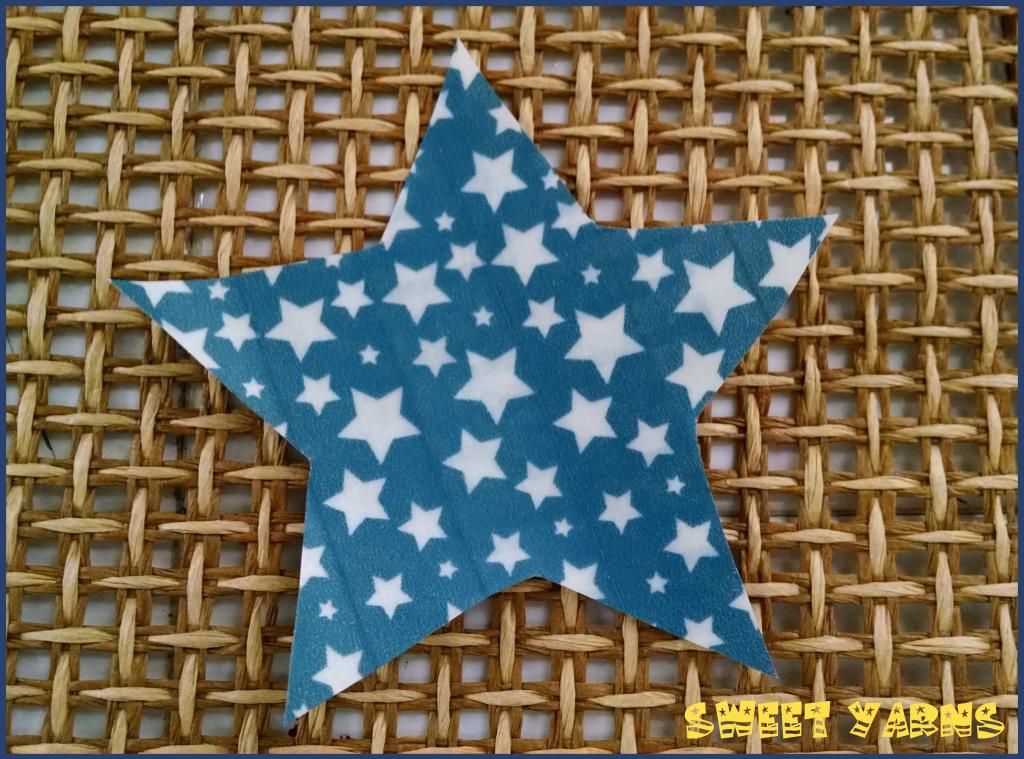
7. Begin adding your contact paper images to your tiles.
8. For extra durability, apply 2-3 coats of Polyurethane all over the tiles. Let dry between coats.
9. I glued felt squares to my tiles to protect my furniture from the tile's harsh bottom. Using a tile as a guide trace and cut felt squares to fit each tile.
I love how my Patriotic Coasters turned out. My favorite one is the Firecracker one. What's yours??? I hope you find some inspiration from this project and give this tutorial a try.
Happy 4th of July...

 |  |
 |  |
 |  |
 |  |
 |  |
 |  |
 |  |
 |  |
 |  |
 |