From decorating Eggs, to the delicious Marshmallow Peeps. Visit Peeps where you can find Fun Facts, Recipes and other Fun Activities.

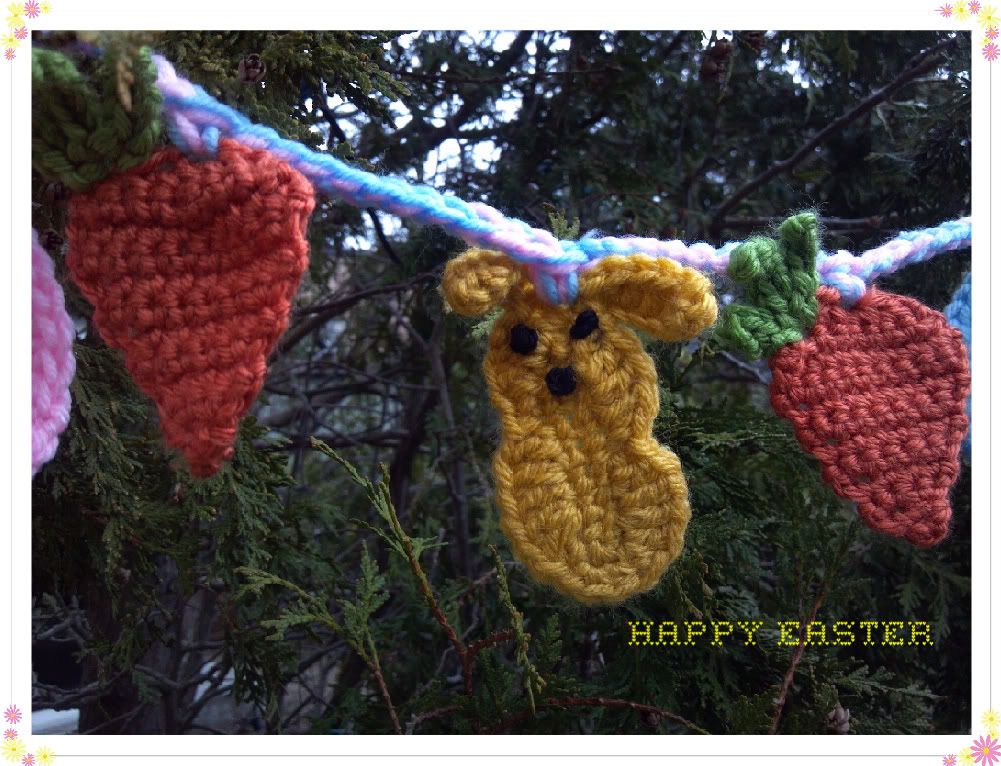
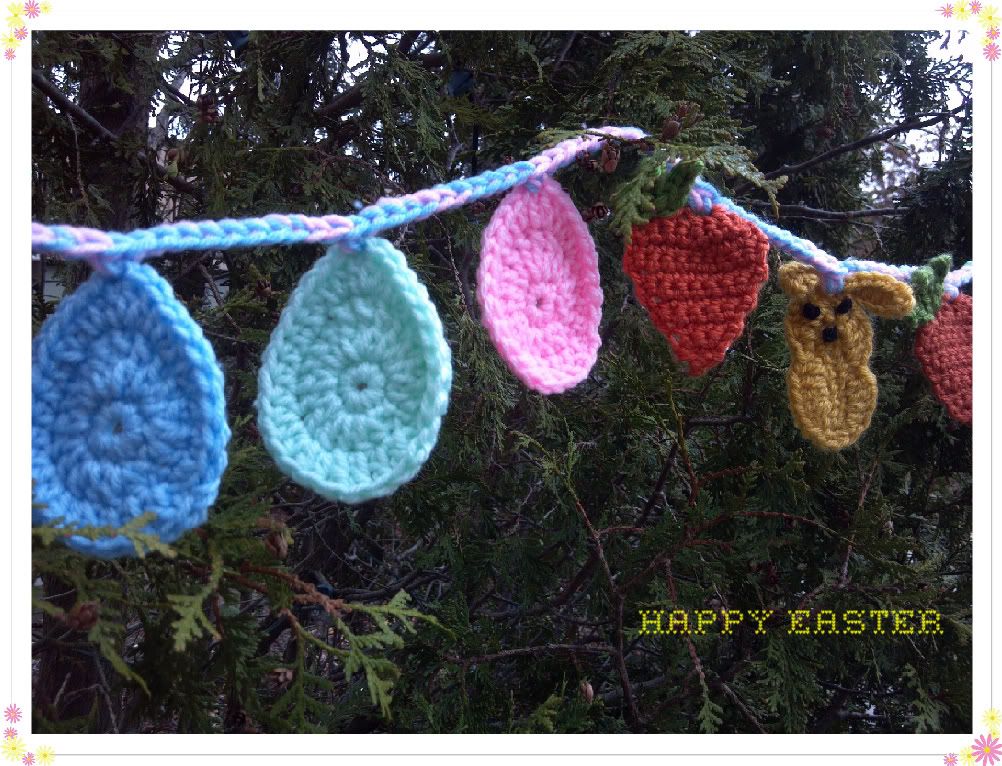
My Easter Egg Garland is made up of Easter Eggs with Marshmallow Peeps and Carrots in between.
Supplies:
- Worsted Weight Yarn in 3-4 colors for the Eggs, Yellow/Black for the Peeps and Orange/Green for the Carrots
- Size H Crochet Hook
- Size J Crochet Hook
- Yarn Needle
Abbreviations:
ch - chain
sc - Single Crochet
dc - double crochet
hdc - half double crochet
tr - triple crochet
sl st - slip stitch
st - stitch tog - together
sc - Single Crochet
dc - double crochet
hdc - half double crochet
tr - triple crochet
sl st - slip stitch
st - stitch tog - together
- With small hook make a Magic Circle or ch 4 and join with a sl st to 1st ch to form a ring.
- Make 10 sc in ring, sl st to first sc to join.
- Ch 2, Make 1 dc in join. Make 2 dc in next 2 sc, 3 tr in next sc, 2 dc in next 3 sc, (1 dc, 1 hdc) in next 2 sc, sl st to first dc to join.
- Ch 2, hdc in next 4 sc, 2 hdc in next 2 sc, 3 dc in next st, 2 hdc in next 2 st, hdc in next 4 st, 2 hdc in next sc, 1 hdc and 1 dc in next sc, dc in next 6 sts, sl st to first dc. Fasten off and weave ends.
-
With small hook, Chain 2.
- Row 1: make 1 sc in 2nd ch from hook. Ch 1, turn
- Row 2: make 2 sc in first sc. Ch 1, turn
- Row 3: make 2 sc in each of next 2 sc. Ch 1, turn
- Row 4: sc in each sc across. Ch 1, turn.
- Row 5: make 2 sc in first sc, sc in next 2 sc, 2 sc in last sc. Ch 1, turn.
- Row 6: sc in each sc across. Ch 1, turn.
- Row 7: make 2 sc in next sc, sc in next 4 sc, 2 sc in next sc. Ch 1, turn.
- Row 8: sc in each sc across.Ch 1, turn.
- Row 9: make 2 sc in next sc, sc in next 6 sc, 2 sc in next sc. Ch 1, turn.
- Row 10: sc in next 10 sc. Ch 1, turn.
- Row 11: sc next 2 sc tog, sc in next 6 sc, sc next 2 sc tog. Ch 1, turn.
- Row 12: sc next 2 sc tog*, repeat * across. Fasten off and weave ends.
- Join the Green yarn on left corner of carrot top with a sl st.
- Ch 5, sl st in 2nd ch from hook. Sc in next 2 ch, sl st in last ch, sl st in previous join.
- Ch 6, sl st in 2nd ch from hook. Sc in next 3 chs, sl st in last ch, sl st in same join as before.
- Ch 4, sl st to 2nd ch from hook and in next 2 ch, sl st in same join as before. Fasten off and weave ends.
- With large hook and 2 strands of yarn held together, Chain 8, sl st to first ch to create the first hanging loop.
- Ch 10 and sc into the middle-top of first Egg. Continue adding the Easter Eggs, Peeps and Carrots in this manner, with ch 10 in between. My Garland's arrangement consisted of 3 Easter Eggs, 1 Carrot, 1 Peep, 1 Carrot... ending with 3 Easter Eggs.
- To finish the Garland, ch 18, sl st in 8th ch from hook to create the second hanging loop.
Your Easter Garland is ready to be showcase. My Carrots did not turn out thin and long, but we can always benefit from a Healthy looking Carrot.....









How cute! Thanks for the instructions! Glad to have you at Things I've Done Thursday!
ReplyDeleteThanks Melanie... Happy to share with your Linky Party guests....
ReplyDeleteWhat a cute garland!
ReplyDeleteThanks Hanni... I love creating Garlands...
DeleteThose are so adorable! You are so talented! I hope you had a great Easter. Thanks so much for linking up to Toot Your Horn Tuesday :)
ReplyDeleteThank you Debbie, so are you.... My Easter was quite. Spent it with Grandma, my only family relative who lives closed by.... How about you??
DeleteReally I appreciate the effort you made to share the knowledge. The topic here i found was really effective to the topic which I was researching for a long time.
ReplyDeleteGarlands
Oh how I wish I could do this!! Someday....So glad you stopped by my blog, I am following you back!!
ReplyDeleteShannon@SewSweetCottage